Lead storage battery installation & commissioning
A guide to Installation & commissioning of large lead storage battery banks.
Lead storage battery or stationary battery are called as such, based on the functions it was designed for. Stationary batteries as the name suggest are designed to function & operate at the location where it is installed & it is not meant to be moved around as an automobile. Stationary batteries have a very long designed life of up to 20 years. This article is a guide to the installation and commissioning of large stationary batteries.
Lead storage Battery Bank Installation Safety Precautions
Only trained & authorized personnel familiar with stationary battery installation, charging & maintenance shall be permitted to install large stationary battery banks. Do not touch the uninsulated terminals or connectors of the battery. Ensure your tools are insulated before starting the battery installation. The vented stationary battery of the flooded lead acid type, produce gases which are explosive. Protect your eyes using wrap-around goggles while working with the battery. Do not smoke, use open flames near a battery. Batteries contain sulphuric acid which can cause burns. Wash the affected areas with flowing water for a minimum of 10 minutes & seek medical attention. Please comply with all local & national laws regarding batteries.
Lead storage battery installation manuals & standards
It is necessary to have the stationary battery manufacturer’s instruction manual ready at hand before starting the installation. Always follow the battery manufacturers installation procedures strictly.
The content of this article is only to give a broad guideline.
It is recommended to have the relevant stationary battery specifications which the battery manufacturer conforms to. Please also consult the following standards:
- IS 1651:2013 Stationary cells and batteries, lead – Acid type (With Tubular Positive Plates) – Specification (Fourth Revision)
- IEEE Std 484 (latest) “Recommended Practice for Installation Design and Installation of Vented Lead-Acid Batteries for Stationary Applications”
- IEEE Std 485 (latest revision) “Recommended Practice for Sizing Lead-Acid Batteries for Stationary Applications”
- IEEE Std 450 (latest revision) “Recommended Practice for Maintenance, Testing and Replacement of Vented
Lead Acid Batteries for Stationary Application” - IEEE Std 1375 (latest revision) “Guide for Protection of Stationary Battery Systems”
These standards can be purchased at IEEE

What to look for on receipt of lead storage battery banks from transporter?
Stationary battery, even large ones are generally packed or covered. Look for any signs of leakage around the packing. Check & inspect for any cracks or breakages on the cells after unpacking. Damages must be brought to the attention of the transporter & damage certificate must be obtained for claims.
Verify the number of packages match with the invoice/delivery challan. Look for the accessories package, open & inspect the contents match with the supplier’s invoice/dc. The following accessories usually are supplied:
intercell & interunit connectors
inter-tier connectors
terminal plates
connection bolts, nuts & washers
flame arrestor vent plugs
instruction manual
Rack/module accessories
First steps in the installation of lead storage battery - install the racks
First, install the battery racks. Ensure they are mounted firmly on the floor brackets, vertical plumb level & horizontal spirit levels are ensured for the rack frames. Large battery banks for stationary applications will remain in place for years together. Removing the heavy stationary battery from the racks could be avoided, with a little foresight. If after installation it becomes necessary to adjust the level of the racks, do not loosen & adjust the racks/frames with the batteries on the racks. They could collapse under the weight. Remove the batteries completely & only then adjust the level of the racks.
In split level tiers, the lead storage battery on the upper level tends to operate at a slightly higher temperature. Ensure headspace above this upper-level row. It might be a good idea now, to clean the floor & space below the racks before starting the installation.
Tools required for installation of lead storage battery - stationary battery
Before starting the installation of your lead storage battery bank ensure the following tools are available at hand:
Personal safety equipment
- Goggles
- Rubber gloves
- Safety shoes
- Rubber apron
- Clean bottled water for eyewash
- A bucket of water with sodium bicarbonate (for spills). Mix 500 grams to 5 litres of water
Battery related tools –
- Insulated torque wrench
- Insulated spanners
- Clean rags
- Hydrometer
- Thermometer
- Voltmeter
- Brass brush
- Plastic brush
- Lifting tools
Lead Storage battery room for Stationary applications
Bring all the cells into the battery room. Always lift stationary battery from the bottom. Do not lift from the battery terminals. Affix the sticker to mark the serial numbers where it can be easily read & won’t get in the way of acid top-up.
If the cells were supplied with acid, check the electrolyte level of each cell. If any stationary cell has electrolyte level below the plates, consider removing the cell. Check with supplier for replacement. If any electrolyte is found on the cover, clean with the sodium bicarbonate solution as described above. Take care that this solution never enters the cell. Clean the terminals as well with this. Rinse clean with water, this solution from the surface of the battery.
Assembling the Lead storage battery cells on racks
Place each battery cell on the racks carefully arranging the cells such that one positive terminal can be connected to the negative terminal of the next cell. Handle the cells only from the corner of the containers, not from the centre. Sprinkle talcum powder on the racks for lubrication if required to slide the cells. Space the cells as per the provided intercell connectors. Check this space with the first cell to avoid shuffling later. For seismic racks, manufacturers supply spacers for use between each cell. After all battery cells are assembled, check the battery serial number stickers are correctly & sequentially affixed. Check & confirm the correct polarity of each cell again.
Fixing the Intercell connectors in the lead storage battery
Before fixing the connectors to the battery, wipe each connector & terminal with the sodium bicarbonate solution as described above. Then wipe with a clean rag dipped in water. Take care that the sodium bicarbonate solution does not enter the vent hole of the lead storage battery. Apply a thin coat of petroleum jelly on each side of the ends of the connectors where they will make contact with the bolts. Apply a thin film on the cell terminal, bolts thread, & washers. Place them on the cells & fasten each one by one using the recommended torque. Never over tighten – the lead posts will be deformed.
Recheck all the connections for torque once again.
Cable lugs connected to the battery directly must be lead plated. All cables must be supported to avoid load on the battery terminals.
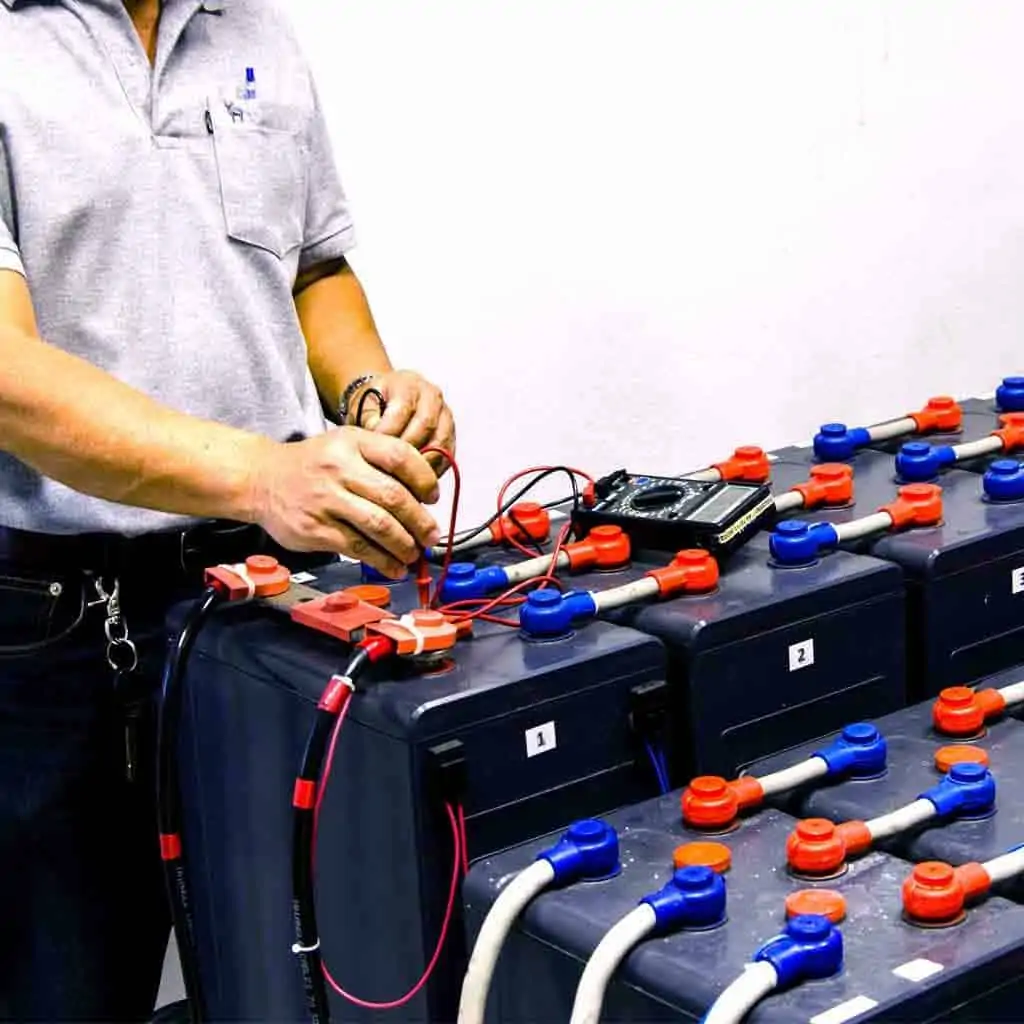
Take the cell voltage & specific gravity for each lead storage battery cell & record cell number wise. Take the lead storage battery system voltage & record. If the system voltage is less than the specified value, check if any cells have been connected with reverse polarity. Correct the reverse polarity immediately & take the system voltage to confirm the correction. Ignoring this could lead to complete failure of the lead storage battery bank due to reverse charging.
Deep discharge recovery: This may be useful for long-neglected cells. The cell is charged at a current equal to 0.2C and when the voltage of 2.4/cell has reached the current is reduced to 0.05C. When the voltage and sp.gr attain a stable value, the charging is stopped and the cell rested for one hour. Again charging is continued at 0.05C amperes till steady state is reached (V & sp.gr const) and gassing is high. Rest again for one hour.
Charging the lead storage battery bank
If the lead storage battery cells were supplied without acid, fill each cell with the specified gravity acid. Take care to fill the cell up to the level between the L & H marks. Do not overfill any of the stationary battery cells. Allow the acid to soak. Record the acid temperature of the cells after filling. Allow all the cells to cool to room temperature before connecting to the charger.
Charge at a current of 3-5% of the rated battery capacity. Complete charging when cell voltage & specific gravity are constant for 3 consecutive hourly readings. Give the freshly charged batteries a rest of 24 hours.
Then do a C10 battery capacity test. Discharge at a current of 10% of the rated capacity of the battery. Record total battery voltage & current. Record cell voltages, specific gravity & temperature in the standard battery record book in a systematic manner. Calculate the ampere-hour capacity. Make correction for temperature as per IS 1651.
The capacity should be at least 85% of the rated battery capacity. If required perform 5 more capacity tests to get 100% battery capacity. Read more about how to correctly charge a battery here.
Always follow the lead storage battery manufacturer’s instructions manual.
What else is needed, for the lead storage battery?
Proper battery charging ensure long life of your investment. Batteries have become integral part of our lives. It is also the most expensive item to be requiring replacement once in 4 to 10 years as the design needs may be. It would be prudent to keep the battery properly charged regularly to avoid premature failures. Battery sulfation can be easily avoided.


